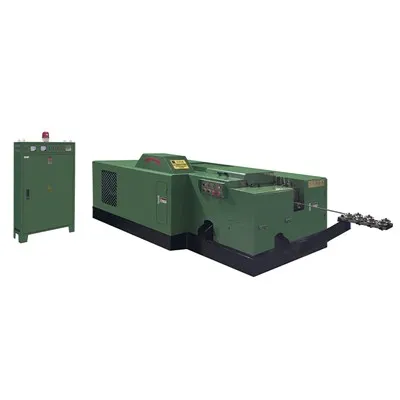
Installing a nut former machine is a crucial process that requires careful planning, precision, and a clear understanding of the equipment. As a reputable nut former machine supplier, we are committed to providing you with comprehensive guidance on how to install your nut former machine effectively. In this blog, we will walk you through the step-by-step process of installing a nut former machine, ensuring that you can get your production line up and running smoothly.
Step 1: Pre-Installation Preparation
Before you begin the installation process, it is essential to conduct thorough pre-installation preparations. This includes selecting a suitable location for the machine, ensuring that the floor is level and can support the weight of the equipment. The area should be well-ventilated and have access to power sources and water supply if required.
- Site Inspection: Visit the installation site to assess the space available. Measure the dimensions of the area where the nut former machine will be placed to ensure it fits comfortably. Check for any potential obstacles or hazards that could interfere with the installation or operation of the machine.
- Power Requirements: Determine the power requirements of the nut former machine. Consult the machine's manual to identify the voltage, frequency, and amperage needed. Ensure that the electrical supply at the installation site meets these specifications. It is advisable to have a qualified electrician install the necessary electrical connections to avoid any safety risks.
- Water Supply (if applicable): Some nut former machines require a water supply for cooling purposes. If your machine falls into this category, ensure that there is a reliable water source nearby. The water supply should have the appropriate pressure and flow rate as specified in the machine's manual.
Step 2: Unpacking and Inspection
Once you have prepared the installation site, it's time to unpack the nut former machine and conduct a thorough inspection. Carefully remove the machine from its packaging, taking note of any protective materials used during transportation.
- Inspect for Damage: Check the machine for any signs of damage during transit. Look for dents, scratches, or loose parts. If you notice any damage, contact the supplier immediately to arrange for repairs or replacements.
- Verify Components: Ensure that all the components of the nut former machine are included in the package. Refer to the machine's manual or packing list to confirm that you have received all the necessary parts, such as dies, tools, and accessories.
Step 3: Assembly of the Machine
The assembly process of a nut former machine can vary depending on the model and manufacturer. However, the following general steps can guide you through the assembly process:
- Base Installation: Start by installing the base of the machine on the prepared floor. Use leveling bolts to ensure that the machine is level and stable. Tighten the bolts securely to prevent any movement during operation.
- Frame Assembly: Attach the frame of the machine to the base. Follow the manufacturer's instructions carefully to ensure proper alignment and connection. Use the appropriate tools to tighten the bolts and nuts.
- Installation of Dies and Tools: Install the dies and tools required for the specific nut forming process. Refer to the machine's manual for detailed instructions on how to install and adjust the dies. Make sure that the dies are properly aligned and secured to ensure accurate and consistent nut production.
- Electrical and Hydraulic Connections: Connect the electrical and hydraulic systems of the machine. Follow the wiring diagram provided in the manual to ensure correct connections. Check for any loose connections or damaged wires. It is recommended to have a qualified technician perform the electrical and hydraulic connections to ensure safety and proper functioning.
Step 4: Testing and Calibration
After the machine is assembled, it is crucial to conduct thorough testing and calibration to ensure its proper functioning.


- Power On: Turn on the power supply to the machine and check if all the indicators and controls are working correctly. Listen for any abnormal noises or vibrations during the startup process.
- Hydraulic System Check: Check the hydraulic system for any leaks or malfunctions. Ensure that the hydraulic fluid level is within the recommended range. Operate the hydraulic controls to test the movement of the machine's components.
- Die Adjustment and Calibration: Adjust the dies to the correct position and clearance. Use the calibration tools provided by the manufacturer to ensure accurate nut forming. Test the machine by running a few trial pieces to check the quality and dimensions of the formed nuts. Make any necessary adjustments to the dies or settings to achieve the desired results.
Step 5: Training and Safety Procedures
Once the machine is installed and tested, it is essential to provide training to the operators on how to operate the nut former machine safely and efficiently.
- Operator Training: Conduct comprehensive training sessions for the operators on the operation, maintenance, and safety procedures of the nut former machine. Provide them with the necessary training materials, such as manuals and videos, to ensure that they have a clear understanding of the machine's functions and features.
- Safety Procedures: Emphasize the importance of safety procedures when operating the nut former machine. Provide the operators with personal protective equipment (PPE), such as safety glasses, gloves, and earplugs. Train them on how to use the emergency stop button and other safety features of the machine.
Step 6: Maintenance and Support
Regular maintenance is essential to ensure the long-term performance and reliability of the nut former machine.
- Maintenance Schedule: Develop a maintenance schedule based on the manufacturer's recommendations. This should include regular inspections, lubrication, and replacement of worn parts.
- Spare Parts Inventory: Maintain an inventory of spare parts to ensure quick replacement in case of any breakdowns. Contact your supplier to obtain the necessary spare parts and ensure their availability.
- Technical Support: Establish a relationship with your supplier for technical support. They can provide you with expert advice, troubleshooting assistance, and software updates to keep your machine running smoothly.
Conclusion
Installing a nut former machine is a complex process that requires careful planning, precision, and attention to detail. By following the steps outlined in this blog, you can ensure a successful installation and get your production line up and running efficiently. As a leading Nut Former machine supplier, we are committed to providing you with high-quality equipment, comprehensive support, and expert guidance. If you are interested in purchasing a nut former machine or have any questions about the installation process, please feel free to contact us. We look forward to working with you to meet your nut forming needs.
References
- Manufacturer's Manuals for Nut Former Machines
- Industry Standards and Best Practices for Machine Installation